Posts

Task schedule configuration (Cron-like)
Image
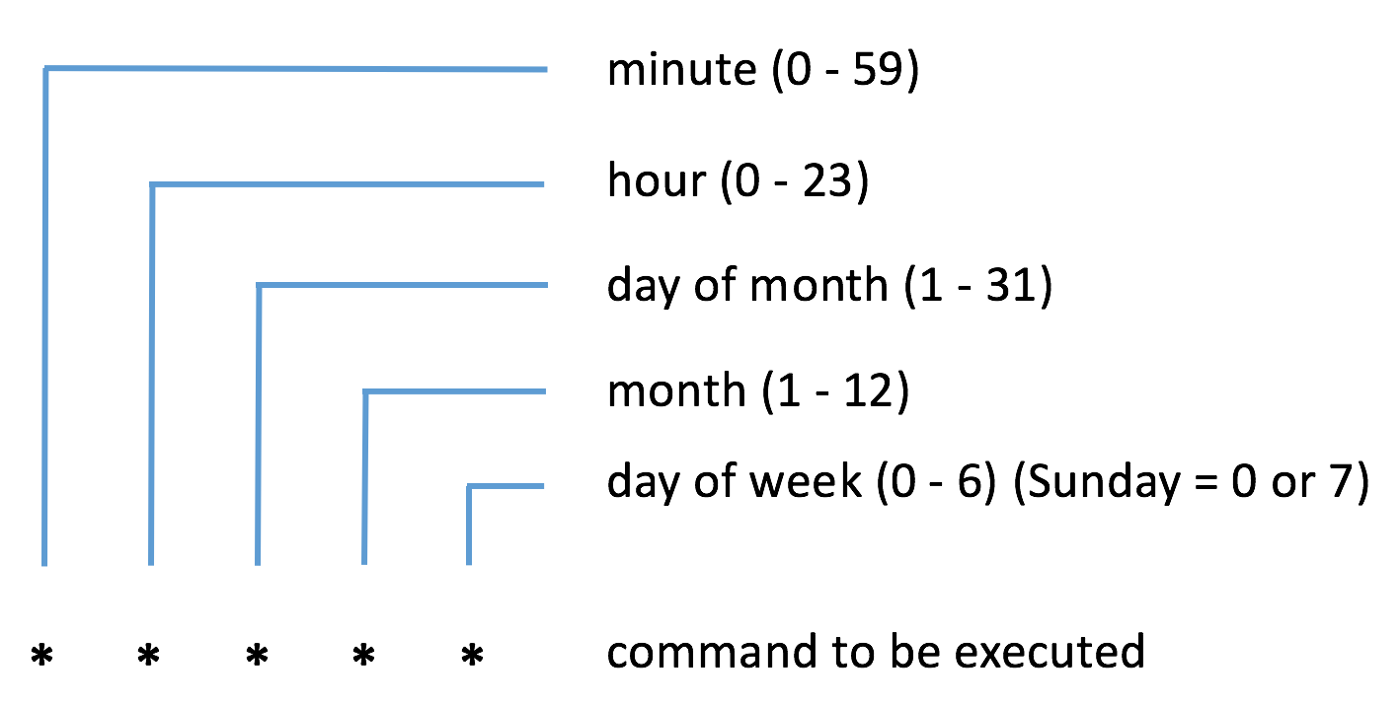
I've rethink schedule run flow and decide to focus on Cron like style. User can still select from simple options like 10 mins, 1 hour, 1 day but they will be stored in Cron format. I found great python lib to simplify this work - Croniter ( https://github.com/kiorky/croniter ). It allows us to validate cron expression and calculate next run time. In scheduler we will check next run time and start task processing if time is less or equal and task status is "waiting". ./backend/controllers/task.py ... @task_bp.route('/start', methods=['POST']) @login_required def start_tasks(): task_payload = request.get_json() task = Task.query.filter(Task.id == task_payload['id'], Task.user_id == current_user.id).first_or_404() if not task.config or not croniter.is_valid(task.config['trigger_value']) : abort(400, 'Invalid Trigger Setup') task.status = 'waiting' base = datetime.now...

GitHub integration

Image
Now the time to add git integration to our Backup Service. Let's start with GitHub first as I like it. There are different types of authentication to GitHub ( https://help.github.com/en/github/authenticating-to-github ) but I want to start with Personal Token. So to connect to our git repository in GitHub we need: username, personal token, name of repository. With this data we can connect to GitHub API and use it in git command line tool via https. To get and store connection data for GitHub I've created new JSONB field in the Task object (at this moment I don't want to reuse connection data between multiple Task, so we can store it in Task level, next we can decide to move it in separate level and join with Task) Before we store connection details to database we need to validate it. I'm going to do it with call to GitHub API to get repository details (repository details we can also store in DB alongside with git credentials and use in UI). On github credentials save w...

Python to Salesforce integration with SFDX CLI and subprocess

Image
Our app purpose is salesforce metadata backup, so we need to implement retrieve metadata logic. In Salesforce we can work with metadata with Metadata API and one of possibility if to retrieve metadata with package.xml file that contains the description of the components we need. But we can simplify it a lot and don't need to use API directly. I plan to use SFDX CLI that offers us a lot of features that we can use with python subprocess lib. More details regarding package.xml you can find here https://developer.salesforce.com/docs/atlas.en-us.api_meta.meta/api_meta/manifest_samples.htm There are different options to build this file. You can do it manually, or use one of automation tools (ex.  https://packagebuilder.herokuapp.com/ ). If you have your package.xml it is the time to add it to the app. We can store package.xml in Task level, so let's add new field to the Task model (with name package_xml ). (You can reference this article to do DB migration -  https://angular-pytho...

SLDS Select (UI Module)

Image
Same like we did it for SLDS Input let's create SLDS Select UI component. .../slds-select.component.html <div class="slds-form-element"> <label class="slds-form-element__label" [for]="idPrefix+'_select-id'">{{label}}</label> <div class="slds-form-element__control"> <div class="slds-select_container"> <select [ngModel]="value" (ngModelChange)="onValueChange($event)" [id]="idPrefix+'_select-id'" [name]="name" class="slds-select" > <option [ngValue]="null">-select-</option> <option *ngFor="let op of options" [ngValue]="op.value">{{op.label}}</option> </select> </div> </div> </div> .../slds-sele...

Salesforce Authentication 2 (Token Validation and Refresh)

Image
In last article we added Salesforce connection setup logic to our application. Now we need to implement connection test logic and token refresh flow.  Connection test flow is a simple request to Salesforce API with access_token. If we receive valid response it means all works fine. In other case we should notify user about problems with Salesforce integration. I mentioned last time when we setup connection and receive response I save it to DB as is as it contains many useful information. And now we can use part of this response. Here is example of OAuth handshake response: { 'access_token': '00Dxxxxxxxxxx', 'refresh_token': '5Aezzzzzzzzzz', 'signature': '8KFGb34p3vMLhSRHHmJZN3Bux9tlcA1+cvgIACw2SG4=', 'scope': 'refresh_token api', 'instance_url': 'https://ap17.salesforce.com', 'id': 'https://login.salesforce.com/id/00D2x000003v71DEAQ/0052x000001S9ojAAC', 'toke...

Salesforce Authentication (Auth2.0 Webflow)

Image
Now it's time to join our app with Salesforce. To send calls to Salesforce API we need OAuth2.0 Access Token and I plan to implement Webflow to get it. Also Access Token has short life and to have access to the API we need to refresh it periodically with refresh token. All this should be setup properly in connected app and in oauth handshake process. First of all we need Connected App with its Key and Secret. Create new Developer Org (it's free) and create Connected App same in this screenshot Consumer Key and Consumer Secret should be stored as ENV Variables for later use in our project ... app.config['SFDC_CONNECTED_APP_KEY'] = os.environ['SFDC_CONNECTED_APP_KEY'] app.config['SFDC_CONNECTED_APP_SECRET'] = os.environ['SFDC_CONNECTED_APP_SECRET'] ... OAuth Handhake contains 2 steps: - first you need to redirect user from your app to salesforce login page (Frontend part). - next catch redirect from Salesforce with code and state information t...

Scheduler jobs in backend (Local Development)

Image
In first post ( https://angular-python-salesforce.blogspot.com/2020/04/scheduler-jobs-in-backend.html ) I've described common approach to implement Scheduler Job. Now I'm going to make it works in local environment for development purposes. I've updated cli commands structure and now task group contains "scheduler" and "run" scripts: - scheduler is designed to call from cron and run tasks processing. - run script is designed to process one particular task ./backend/scripts/task.py import os import sys import click from flask import Blueprint from models import db, Task task_scripts = Blueprint('task_scripts', __name__, cli_group='task') def run_task_helper(task): if current_app.config['is_development_mode']:: print('RUN TASK LOCALY') import subprocess subprocess.Popen(['flask', 'task', 'run', str(task.id)]) else: print('RUN TASK IN PRODUCTION ......

Spinner for SLDS-UI Module

Image
One more interesting use case for SLDS UI Module I want to describe is Global Spinner. I'm not sure is closing of the whole page under the Spinner on requests is good practice, but my practice shows it looks nice and is clear for users that something happens in background and they should wait. As Global Spinner should be the singleton we need to provide some interface to interact with this component from any place in our application. First generate component (like described here - Custom SLDS-UI Angular Module ) ng g c slds-global-spinner --module=slds-ui.module.ts --prefix="" --export=true and service ng g s slds-global-spinner   (move slds-global-spinner service to the component folder to make it looks better) Add  SldsGlobalSpinnerService to "providers" list in slds-iu.module.ts slds-global-spinner.service.ts import { Injectable } from '@angular/core'; import { Observable, Subject } from 'rxjs'; @Injectable({ prov...

SLDS-Input for SLDS-UI Module

Image
One of the important and big steps in custom UI elements developent is Custom Form Component . We should be able to create our own UI components that must behave as standard component from Angular  FormModule . In this case we need to implement  ControlValueAccessor interface with few some additional hacks. I want to start with simple input that I will wrap with SLDS input form-element styles . slds-input.component.html <div class="slds-form-element"> <label class="slds-form-element__label" [for]="idPrefix+'_input-id-1'"> <abbr *ngIf="required" class="slds-required" title="required">* </abbr>{{label}}</label> <div class="slds-form-element__control"> <input [type]="type" [ngModel]="value" (ngModelChange)="onValueChange($event)" [id]="idPrefix+'_input-id-1...

SLDS-Modal Componen (Custom SLDS-UI Angular Module)

Image
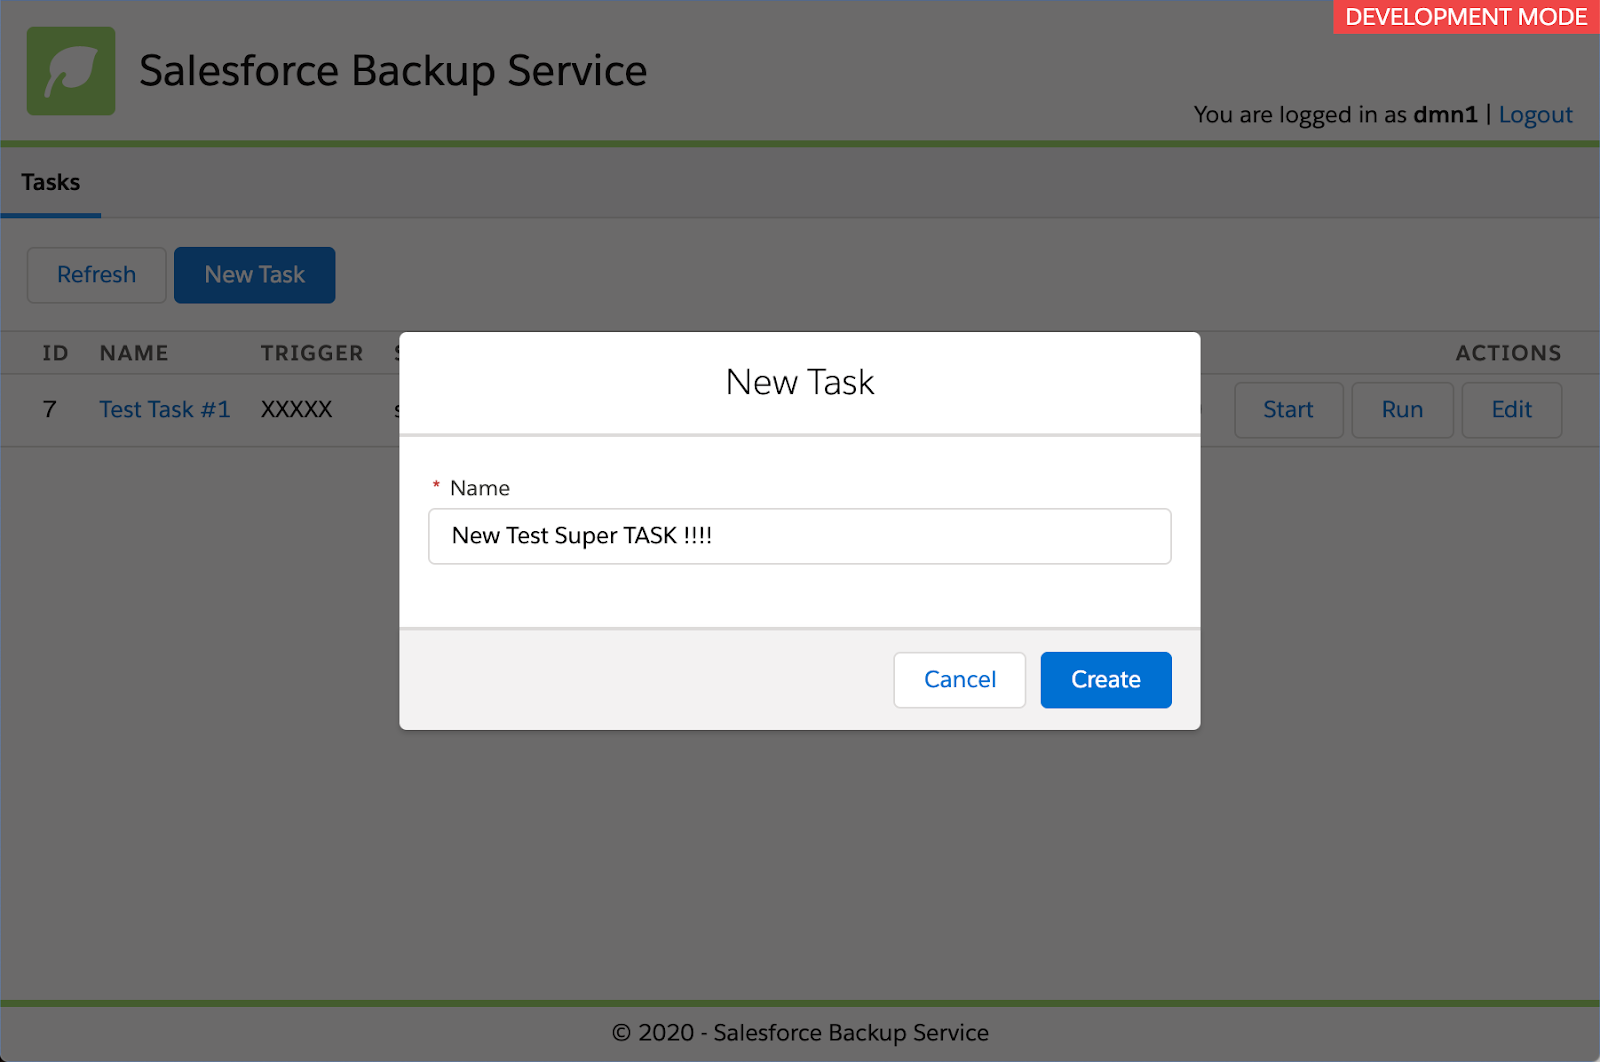
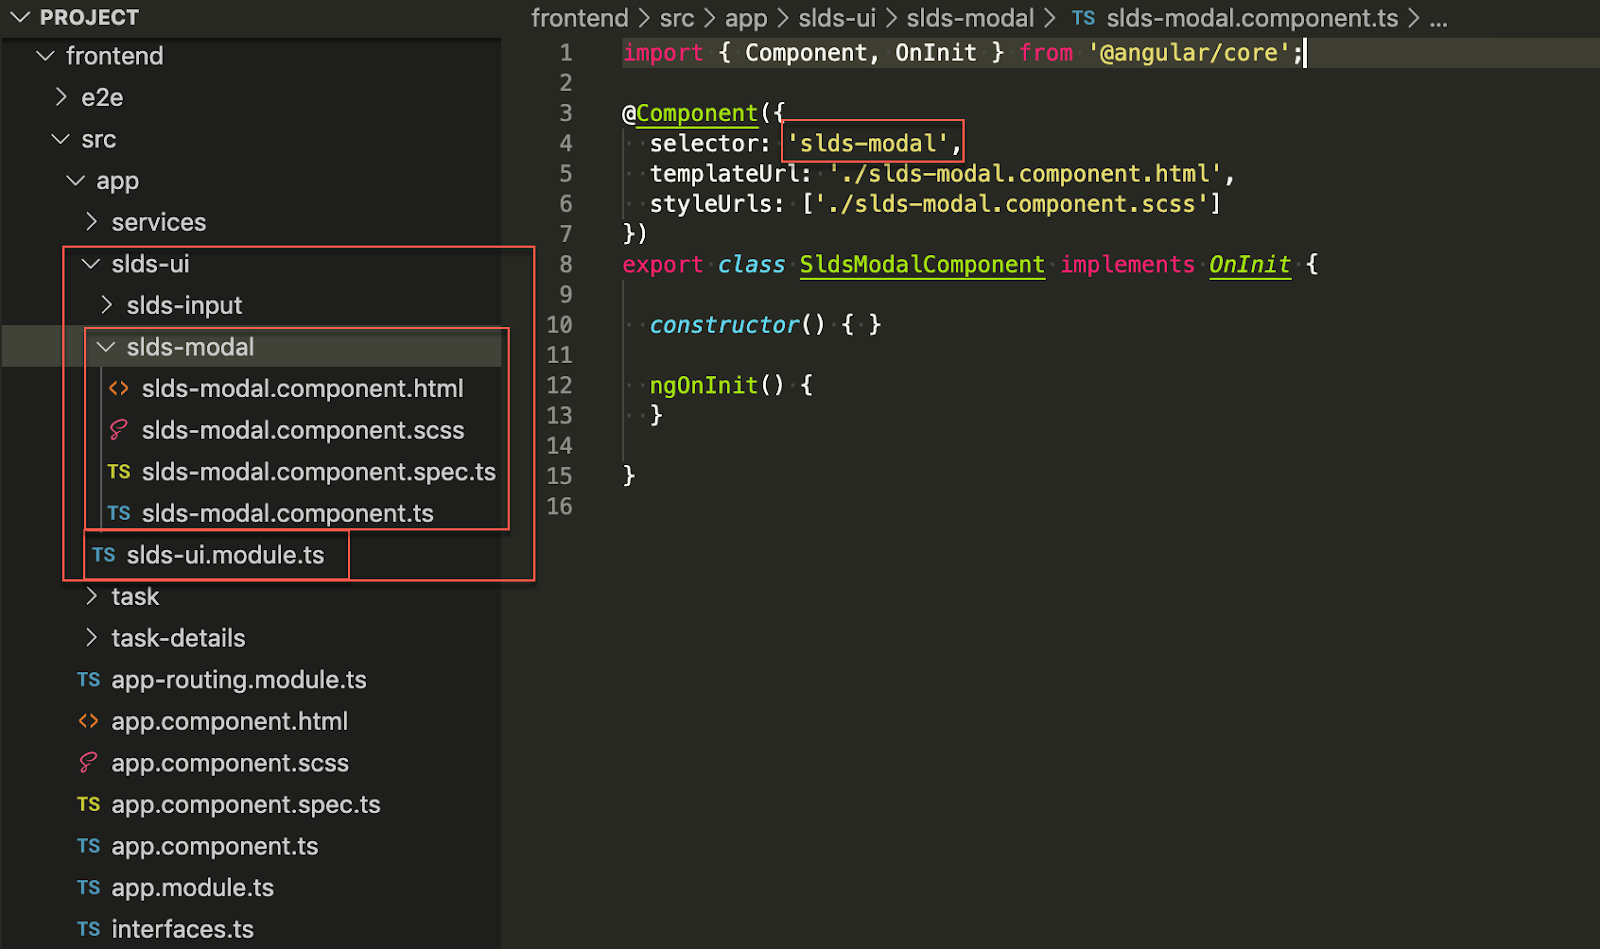
In this article I will continue to develop Task CRUD related logic. Last time ( https://angular-python-salesforce.blogspot.com/2020/04/tasks-ui.html ) we created List and Details view components for Tasks. This time let's create modal for new Task. But this time it should be a little bit complex solution - I want to start with reusable UI components. I will create Modal and Input components based on SLDS ( https://www.lightningdesignsystem.com/ ) we use in our project. First we need to create separate Angular module to join all UI elements we plan to create. cd ./frontent ng g m slds-ui cd ./src/app/slds-ui/ ng g c slds-input --module=slds-ui.module.ts --prefix="" --export=true If all works fine you should see this folders structure. " --prefix" here disables default " app-" prefix that angular append to all new components, so you can see " selector: 'slds-modal' " One more small hack to prevent tslint warnin...

Tasks UI (Angular Routing)

Image
As we have started with backend for Tasks let's focus on Frontend side too. We need to create lists/create/edit/delete component for Tasks in our Angular app. Create template for tasks angular component cd ./frontent && ng g c tasks Before we start to work on component itself let's add global navigation to the Angular app and bind our task component to the /tasks endpoint. ./frontent/src/app/app.component.html <div> <div class="slds-tabs_default"> <ul class="slds-tabs_default__nav" style="background-color: #F3F3F4;"> <li class="slds-tabs_default__item" [ngClass]="{'slds-is-active': url=='tasks'}"> <a class="slds-tabs_default__link" routerLink="/tasks">Tasks</a> </li> </ul> <div class="slds-tabs_default__content"> <router-out...